venerdì 28 dicembre 2007

Sxratch v2.1


Virtual Scratcher
Specs:
-FILTER SECTION-
Resonance, High Freqs, Low Freqs
-SENSIVITY SECTION-
Start and End knobs: They set the range points where you want to scratch, useful to get more accurate scratching moves.
Accel: Acceleration or "torque" of the scratcher after you click then release over the scratching slider.
SMTH (Smoothing): Sets the smoothness of the scratch moves.
New!
Mute button: You can control sxratch muting using MIDI keyboard notes and also you can link this button to your hardware. (CC#30)
Mute response: Negative, positive muting response (muting or playing on note event) (CC#29)
-MAIN SECTION-
VOL: Sets the main volume.
PITCH: Sets the "speed" of the "record" (RESET button to reset knob to original pitch)
REW (Arrow near pitch knob): Plays the sound backwards.
-FILE SECTION-
FILE button: Click on it to load a *.wav file. (Sxratch works better with files shorter than 10 seconds)
Record button: It records the input signal, useful for live use, pick snippets from your band mates and scratch over that. :)

USAGE:
Important: You should extract the files from the zip with the exact same directory structure or sxratch will not find the default sample.
On FL Studio:
-Load Sxratch on an FX slot on the mixer, set MIDI in to port 1 (The scope and lower slider should be moving, if not try hitting CTRL+H, if it doesn0t work, you need to extract the files from the zip in the correct way)
-Load a MIDI out channel, set it to port 1
-Send audio to the FX where sxratch is loaded.
-Load a FILE or press the REC button to record something inside sxratch.
-Now play using your keyboard (the loop will sound) while moving the sxratch upmost slider.
On Cakewalk Sonar:
-Load an audio track, load Sxratch VSTi there.
-Load a MIDI track, select MIDI out to control Sxratch.
-Load a FILE or say something while pressing the REC button within sxratch.
-Now, to play, press any key on your MIDI kb while moving the slider.

Here is a video, courtesy of Rory Dow featuring Sxratch beeing used with a KORG KAOSS PAD.
DOWNLOAD THE VIDEO (Better right click and "save as" - QuickTime - 3mb)
READ "FRUITY SCRATCHER - MOUSE SKILLS" (and you'll find out why I'm such a freak about this scratching thing)

Download Sxratch

Granola v1.0


Granulation tool
Specs:
- Record button: It records the input signal (you should click this prior to make any sound)
- Granola big slider: With it, you can virtually "travel" across the recorded audio sample.
- Volume, Pitch, Grain Xfade, Grain size, Smooth controls.

USAGE:
On FL Studio:
-Load Granola on an FX slot on the mixer, set MIDI in to port 1
-Load a MIDI out channel, set it to port 1
-Send audio to the FX where Granola is loaded.
-Press the REC button to record something inside Granola.
-Now play using your keyboard while moving the Granola slider.
On Cakewalk Sonar:
-Load an audio track, load Granola there.
-On the same track, select an audio input and press the R button.
-Load a MIDI track, select MIDI out to control Granola.
-Say something while pressing the REC button within Granola.
-Now, to play, press any key on your MIDI kb while moving the slider.


Download Granola

Granola v2.0 RC1


Granulation tool
Specs:
- Wave file loader: Now you can load WAV files also.
- Record button: It records the input signal (you should click this prior to make any sound, unless you loaded a WAV sample)
- Granola big slider: With it, you can virtually "travel" across the recorded audio sample.
- Volume, Pitch, Cutoff, Grain Size, Smooth, Panning FX, Panning FX Speed, Random FX, Random FX Speed.
- Play with keyboard while moving slider (A - 3 = Original Pitch)

USAGE:
On FL Studio:
As generator (if you want only to load files)- Load Granola 2 in the step window, load a file, and play using keyboard (A - 3 = Original Pitch)- Move the slider to "travel" thru the wave file.As FX (to be able to record)-Load Granola 2 on an FX slot on the mixer, set MIDI in to port 1
-Load a MIDI out channel, set it to port 1
-Send audio to the FX where Granola is loaded.
-Press the REC button to record something inside Granola.
-Now play using your keyboard while moving the Granola slider.
On Cakewalk Sonar:
As generator:
- Just load Granola 2 in an audio track, load a wave file.- Use a MIDI track to be able to play Granola 2 (just like any other VSTi) As FX:
-Load an audio track, load Granola 2 there.
-On the same track, select an audio input and press the R button.
-Load a MIDI track, select MIDI out to control Granola 2 .
-Say something while pressing the REC button within Granola 2 .
-Now, to play, press any key on your MIDI kb while moving the slider.

Download Granola

Synodeia v1.0


Live sample triggering plugin.
Description:
"Synodeia" is a VST effect, but instead of processing the incoming signal, it can recognize pitches (frequencies) from a monophonic source and trigger samples depending on each tone.
"Synodeia" is a greek word and it means "Accompaniment". This plug-in is made specifically for live performances where a soloist can trigger samples while playing his instrument. This applies to voice and any other monophonic instrument.
Specs:
-12 recognizable frequencies (full 12 tone scale)
-12 *.wav players, user can load custom made samples.
-Lots of controls to fine tune each frequency, input volume and detection response.
-"Hints": no help needed, all is right there (just hover the mouse over controls)
-Equal temperament presets (Oct 0 to Oct 5)
-Comes in two versions "Synodeia.dll" (L-R out only) and "Synodeia m-o" (Multiple audio outs-12 stereo pairs)


Download

Synodeia v2.0


Realtime audio to MIDI triggering plugin.
Description:
"Synodeia" is a VST effect, but instead of processing the incoming signal, it can recognize pitches (frequencies) from a monophonic source and sends MIDI out messages, so you can control any VST or MIDI device using your voice for example.
"Synodeia" is a greek word and it means "Accompaniment". This plug-in is made specifically for live performances where a soloist can trigger samples while playing his instrument. This applies to voice and any other monophonic instrument.
Sinodeia 2, because its nature,is very light on the CPU, instead of it's lil brother, sample player version Synodeia v1.
Specs:
- Octave shift
- Sine tone for testing, measuring purposes. (Sine tone and tone decay time)
- Input volume, Accuracy control and incoming signal monitoring (bypass)
- MIDI output messages monitor.
- The zip package contains an "Fmin chords" soundfont for you to test singing while synodeia does the accompaniment.

Usage:
On FL Studio:
-Load Synodeia2 on any mixer channel, set an output MIDI port (1 for example) (you can get to the MIDI out port option by pressing the leftmost icon on the plugin window and switching to "MIDI output port")
-Load any VST you want (suggest you to try with the provided Fmin chords sounfont, is very entertaining) set its MIDI input to the same port (1)
-Connect an external signal to the mixer channel where synodeia2 is loaded. (example a mic, your voice)
Now, sing and you should be triggering MIDI notes, watch the MIDI monitor.
On Cakewalk Sonar:
-Load synodeia2 on an audio track
-Load a VSTi just after synodeia2
-Click on teh red R, and start singing.

Known issues:
- Synodeia2 doesn't recognize legatto lines yet. It's internal configuration makes it impossible at this time, I'm still searching for a solution though, that and a way to make glissando too. Meanwhile be sure to leave al least a little space between notes so synodeia can recognize the peak information and trigger a new MIDI message.

Download

Daft Funk v1.0 (currently in beta status)


Quick note: The name of this plug is actually a mistake, daft funk was conceived as the typical effect in the build up moment in that famous FatBoySlim song "The Rockefeller Skank" ..my sincere apologies....but in the other hand, the plug will keep the name "Daft Funk", the reason? there's a nice plug called "PhutBoy Slim" and for obvious reasons I can't use a similar name.
Glitch accelerator.
Specs:
- X-Y panel: X controls speed, Y controls LowPass Filter and volumen optionally.
- Mode: "Pitched" means the wave will be resampled as speed is beeing modulated. "Grainy" means the wave will not change pitch but the grains will change size as speed is beeing modulated.
- Sync mode: "BPM" or "Free"
- Note subdivision selector.
- Y->Vol (Y value to Volume) button.
- Zero - X: Useful only in "Grainy" mode, this parameter is useful to avoid clicks, but if you want to go very fast you better untick this option, otherwise you'll hear an artifact in where the pitch transitions aren't smooth on very high frequencies.
- X and Y spring buttons: Enable disable spring release on them.
- Smooth knob: This smooths out the X and Y values, high values result on slow response to quick movements, useful to make slow sweeps such as on one Daft Punk famous song.
- Grain size knob: When in "Free" mode (opposed to BPM) you can specify the grain size here.
Audio examples:
Grainy Mode (mp3)
Pitched Mode (mp3)
KNOW ISSUES: For some reason, when you record automation, Daft Funk exhibits different bugs including 1) Not producing any sound 2) Not moving as expected...I'm truly sorry about this and I want to let you know that I'm still working to fix these issues.


Download Daft Funk

Milli Vinylli 1.5


Old vinyl sound generator.
Specs:
First row of buttons are to turn generators on/off.
Phase buttons to switch variations position.
Var: Adjust the level of variation depending of the generator.
Vol: Volume knobs for each generator.
Density: Sets the noise density on the clicks, dust and friction generators.
Main Vol: Main volume of the sum of all generators.
Fq: Frecuency or "tuning" of each generator.

Download

MetroBus 1.0


Metronome plug-in. (VST-fx)
Description:
MetroBus is a little metronome plug-in that detects host BPM tempo. Very handy on Ableton Live to send a "click" to a drummer for example.
Specs:
- Wave file loader.
- Beat division (1(none), 2, 3, 4, 6, 8)
- Volume knobs for Strong and Weak beats.
- Delay input box: Useful to align the metronome to your host sequencer (mostly for Ableton Live)
Download
Important note: When decompressing make sure you have "MetroBus.dll" and "Click.wav" on the same folder.

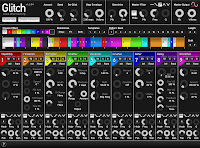
Glitch v1.1


MIDI triggered random delay FX

Specs:
- MIDI = MIDI activity LED
- Fbk = Delay Feedback
- TIME = Set delay time region (off when MIDI button is on)
- "S" button under Time = Only equal time divisions (1/2 - 1/4 - 1/8 etc...) to make more synced patterns.
- MIDI Button = Let user to set the speed by MIDI keyboard note messages, useful to make time speed patterns.
- T/R = Delay time range of random values (off when MIDI button is "on")
- Filt = Low Pass Filter ammount
- LFO = ammount of LFO to Delay Time (to make wavy times)
- "S" button under LFO = Sync LFO to host BPM
- BPM Subdivision selector (do I need to explain this?)
- Fq = LFO Frequency
- MIX = Wet / Dry MIX

Usage:
- Glitch sends a random delay time value on every MIDI note input so you basically grab a MIDI channel and sequence time changes. You can also specify the times by MIDI note number instead of a random value.

Sound Examples:
-On a drumloop.
HERE
-On a piano.
HERE

Download Glitch

Mr. Green v.1.5


X-Y based state variable filter.
Description:
Mr. Green is a LowPass, HighPass, BandPass, Band Reject VST plugin. But instead of sliders it features a pair of sexy LCD looking X-Y pads.
Specs:
-Left X-Y pad: Controls the state of the filter (LP, HP, BP, BR)
-Right X-Y pad: Controls the "Cutoff" and "Resonance" (Cut-Res)
-"Link" button (useful when moving between filter states)

Download

BackMan v1.3.2


Reverses incoming audio signal in sync (it will follow host BPM). This plugin is specially useful on live gigs to make that "back spin" effect DJs usually does.
Specs:
- Very simple, just one slider.
- Slider on the right means forward (>>), slider on the left means backwards (<<) - Compensation control: Reverse playback timming compensation, fine tuning, useful to sync signals on different sound materials. - Gap position button: Defines where you want the slices gaps, turned off means the gap will be on each strong beat (useful for "backman sandwich" trick, see usage below), turned on means the gap will be delayed one 8th of a note to avoid the gap on fast high transients such as snares and kick on a regular drum loop. Gaps? what? where?: In a nutshell, BackMan is no more than two samplers recording the input and playing in reverse, but the actual trick involves a "flip-flop" process. On a 4/4 bar, counting 1,2,3,4 ("...this is rokanrol!") while one sampler is doing "record-play-record-play" the other is doing "play-record-play-record", this process takes one bar each time and therefore each sampler is taking two "slices" out of the input signal and playing them backwards, all in sync with the host BPM tempo. This process creates clicks on the signal because the sampled slices not necesarily begins and/or ends at zero volume point (zero crossing) thus creating nasty audible clicks on the audio. The only way I found to solve that was to tame those clicks doing very quick fade in/out over each slice, this creates very tiny gaps on the audio which aren't as bad as clicks but they still could be heard on certain situations. The most common case is having little gaps just over the snare and kick on a drumloop, that's why I included the "gap position" button, to be able to locate the gap away from the bigger transients. - USAGE - Important information - 1) The most tricky part is keeping the dry and wet signals in perfect sincronization so the fastest way is to put the big slider on the middle to be able to hear both signals, then use the little slider on the top to fine adjust the timing of the backwards signal (you can CTRL+Drag to fine tune) If you're using a drum loop for example, you need to sync both signals so both snares hits as close as possible (one over the other), and finally move the big slider to forward and backwards to see if they sound really natural when switching (even while you think they are synced is good to check this way). You'll need different values of the little slider depending upon the sound material, even if BackMan is calibrated to sound perfectly in sync, almost all kind of material needs a different value. So the procedure is the following: - a) Put the big slider on the middle and play the loop/song. - b) Check if both wet and dry signals are in sync, and adjust the little slider accordingly. - c) Move the big slider to check if they sounds natural when switching forward and backwards. - d) If they doesn't, fine tune the little slider again while switching as in step c) Now if you have them in sync, turning off the "gap position" button will cause the backwards signal to sound one 8th earlier, it will stay in sync but the sounds occur in different places. If you're using a drum loop for example you'll hear both back and forth snares at a distance of one 8th of a note, this could be useful if you want to break the rythm while switching directions. Other useful thing about the gap button is that you can define where the internal backman "flip-Flop" will occur, and thus where the slices gaps will be located. This is useful when you want to do the "backman sandwich" trick. - BackMan sandwich trick- This one is very useful to create "reverse tail reverbs" on the fly without having to record one long reverb tail and bouncing to a wave file. - Place a chain like this "BackMan-Reverb-Backman" - Turn off both "gap position" buttons. (otherwise the orignal input sound will sound chopped, not good for vocals or if you want your input untouched) - Turn off the second BackMan and get both (back-forth) signals on the first BackMan sincronized as explained earlier. - If the first one is in sync, turn it off and do the same to the second Backman. (save, load plugin presets is a good quick solution on this case) - Now turn them on and set both BackMans to reverse mode. Voila! instant backwards reverb! (take note that you need to put your source material a quarter or half a bar earlier) - Other cool tip is that by fine adjusting the little sliders on both BackMan instances you can make a straight beat to sound shuffled. Have fun!!! Download BackMan

OverDubber v1.7.4


Two tap delay focused towards Dub creation and Live use.
Specs:
-Two tap delay.
- BPM based times, with dotted time button.
- Big knobs
- "Explode" Trigger to do controlled feedback loops in one click.
- MIDI Learn
- Panic! button
- Pitch-Mod (simulation of tape speed fluctuations)
- Changing host tempo caused clicks in the past, delay time transitions are smooth now.
- Added a tape reel knob; it allows user to play with delay speed manually. It has two modes "accel" and "scratch" both produces different results:
- Accel: Acceleration, the effect sounds like someone adjusting the speed of a tape reel machine, but always going forward.
MP3 sample
-Scratch: It sounds more like when someone is scratching a vinyl, back and for, back and for ("making a scratch!")
MP3 sample
To change between modes click on the text just below the knob. Both modes are back to sync when the knob is zero.
What's new on 1.74:
Finally added hints for all controls.
- WARNING - This version is not compatible with the old v1.1 so I suggest you to finish any work using OverDubber with the old one.

DeeLay v1.51


You got six delays with filtered feedback that will follow the tempo of your host sequencer.
Specs:
-Six delay lines with multimode filter and panning per delay.
-Synced or manual delay time controls, delay time up to 80 seconds. (10sec for the sm version)
-Buttons to deactivate the delay, mute the input or choose L or R as input.
-Delay routing.
-Internal limiters on every delay to be able to create distorted feedbacks without blowing up your speakers.
-PANIC button to lower all feedbacks at once.
-Input button: Turns input On/Off
-Hints on all controls that makes the plug pretty self explanatory.
-MIDI automation and MIDI learn.
Download Deelay (big 80sec delay time)

P-DeeLay v1.0


Pattern based delay.
Specs:
-Six delay lines with multimode filter and panning per delay.
-Synced to BPM host in a pattern fashion.
-Buttons to deactivate the delay, mute the input or choose L or R as input.
-Internal limiters on every delay to be able to create distorted feedbacks without blowing up your speakers.
-PANIC button to lower all feedbacks at once.
-Input button: Turns input On/Off
-Hints on all controls that makes the plug pretty self explanatory.
-MIDI automation and MIDI learn.
UPDATED: Now the pattern selectors responds to horizontal mouse movements (as they should on the first place)

WNM-1 (Weird Noise Machine)


If you like crazy modulated sounds this VST instrument is for you.
KLANGLABS
WNM-1 (Weird Noise Machine)
Three independant modules.
Six osc's on each module, first five are modulators and can be routed to other osc's.
Sine, Saw, Ramp, Triangle, Pulse, w-noise and p-noise waveforms to choose from.
Freq, Pulse Width and Modulation depth for each osc.
ADSR envelopes for each module.
Multi outs
Every Oscillator can be set to "Track" the pitch of your music keyboard, this allow you to either make every note to have the same timbre but diff pitch or just add more weirdness.
Oscillators routing include "Out", this allows you to split every module to various parts, when an Osc is set to "Out" it will no longer modulate other oscillators, instead it will produce sound and you can use other Osc's to modulate it.
Pitch tracking
What's new in v1.7
Newer skin, smaller and funkier.

mercoledì 28 marzo 2007

Yoinkinline sample tool v1.2


Yoink is a vst effect best used for live performance. it has an inline sampler that you can grab samples from the current live effect channel. you can then trim the loop, reverse, and process with effects in realtime. the left joystick controls bitrate and pitch, while the right joystick controls delay time and delay feedback. the demo mp3 was a simple beat, processed in realtime. version 1.01 brings the new user interface, as well as some small bug fixes and optimizations.


Classic Delay


The Classic Delay emulates three of the most commonly used delays / echo sounds types: Tape, Analog, and Digital, but without the introduction of noise. A quality control is included where the sound of the echo machine can be adjusted to give the preferred amount of “imperfection”. The delay can be synchronised to the host, and the feedback can be reversed to give a ping-pong effect.
Features
Tape-, Analog- and Digital Delay sound
Ping-pong delay
Quality control
Filters
Presets
Ultra low CPU usage
Supports sampling rates up to 96kHz
Full VST automation
Tips
1.
The tape delay type gives you the sound of echo being degraded slightly each time it is fed-back and re-recorded. You can adjust the quality control for the amount of flutter and distortion introduced.
2. The analog delay type has a very "dark" sound due to the low sampling rate and sharp filters used to save analog memory. The "darkness" of the sound can be adjusted via the quality control, which emulates the changing of the sample rate.
3. The digital delay can be adjusted from bright and clean on the highest quality setting, to a “darker” and more noisy / distorted sound if the quality setting is set low. This enables you to emulate the sound of older digital delays with less bit depth and a lower sample rate.


lunedì 26 marzo 2007

Glitch One last release: 1.3.04


Glitch is a VST plugin effect for Windows-based systems running a VST 2.3 compatible host.
Glitch chops up your audio in real-time and applies a variety of effects which can either be chosen at random, manually sequenced, or a mixture of both. The sounds it generates range from quite subtle to extremely bizarre, depending on how much you tweak the controls.
It’s got 9 different effects that you can sequence however and trigger whenever you like. I liken it to a virtual version Korg’s Kaos Pad.
Fix: it shuts off some modulations and increases sensitivity to input, it also changes the Mix slider action.
Gating: it turns on gating by input, so with no input Glitch One is muted.
Tuning: it tunes the main oscillator.
Rate: speed of the main LFO.
Random: variation amount on Rate.
Mix: If "fix" off : it balances noises cycles (left) with tone cycles (right), If "fix" on : it adjusts the amount of pitch modulation
Timbre: FM amount.
Stereo Offset: delay time offset on channel 1, depends on Delay Time setting.
Delay Time: from 0 to about 3 seconds.
Feedback: with low times and high feedback you get almost a comb filter, don't push it to the very max.
Volume: output level of the synth.
Dry: output level of the input signal.

Iblit synthesizer.


Iblit is a monophonic VST 2.3 compatible software synthesizer for PC.The oscillator waveforms are generated using BLITs (Band Limited Impulse Train)which gives oscillators with very low aliasing.


Features

  • 3 oscillators


  • Pulse and Sawtooth waveforms


  • Noise generator


  • Transpose ±24 semitones


  • Fine Tune ±50 cent


  • Pulse Width Modulation


  • Individual Pitch Bend range for each oscillator


  • Portamento


  • 24dB/octave LP/HP filter


  • Two LFOs


  • Two ADSR envelope generators


  • Midi automation and Midi learn


Download from here.


( from www.bostreammail.net )

Bionic Delay version 1.2


This enhanced version of the Analogic Delay gives you separate control over the delay times on left and right channel. suitable for ping pong delays and drifting delays.


-Tape model including tape saturation, wow, flutter, low and high pass filtering
- Separate control of delay time for left and right channel
- The delay time is not entered in milliseconds but as a notelength (in relation to the song tempo in your sequencer). The Groove parameter allows fine tuning from tripplet to dotted note timing.
- "Drift" parameter gives you the possibility to create delays wandering to the left or to right in the stereo field
- press the "Ping Pong" button to create delays alternating between left and right speaker.
- parameter "Smooth" creates continuous delay time changes like on a real tape delay (no digital clicks when changing delay time during the song)
- parameter "Stereo Width" varies stereo effect from subtle to drastic
- all parameters are controllable by midi controllers.
- pop-up hints help to understand the function of each control on the user interface. These appear when the mouse rests over a control.
- Also the assignement of midi controllers is documented in the pop-up hints


Bionic Delay was used by Coldcut on their album "Sound Mirrors"Coldcut's Jonathan More says: "Bionic Delay is great for that King Tubby feel."


sabato 24 marzo 2007

Classic Flanger


Take a trip back to the mid 80's with our Classic Flanger. It will give you that subtle or massive swirling effect that is used mainly for guitar, but can be used for many other instruments as well. Due to a tightly controlled feedback path, it is possible to boost the flanging effect to maximum without getting unwanted side effects.
Features
Smooth Flanger effects
Stereo spread
Host Synchronization
Presets
Ultra low CPU usage
Supports sampling rates up to 96kHz
Full VST automation
Tips
1.
When feedback is set at a high level, the output can become very dynamic. In that case, just use our Classic Compressor or Classic Master Limiter after the Classic Flanger to control the dynamics.
2. Don't settle with the flanger only on your guitar. We have had great results using the Classic Flanger on everything from strings to drums. Try it on all your tracks to see what it can do for you. You might be surprised!


Synt AM TB-30X 2.0


Nice TB-303 kinda (so not really authentic at all!) plug with subosc and overdrive for that Phat Bassline. Works in most VST hosts like Cubase, FL, Project 5, Aodix and others.

Version 2 now online after user requests for extra features.

New features are:

Midichannel Selector

Mono/Poly Selector

Bend Range Selector

Panorama

New Cool Interface

Retro Delay


Retro Delay is a flexible allround delay effect in VST format.It has the character and sound of a vintage delay unit but features many modern options.Besides delays, it can produce a wide range of modulation, chorus, flanger and phaser effects.

Features:
Independent left and right channel delay lines
BPM synced or manual times (up to 6 seconds)
Forwards or backwards delays
X-feedback
Ping-pong delays
'1 feedback pass', there will always be 1 feedback
Optional negative feedback for phaser/flanger effects
Optional short delay times for phaser/flanger effects
Integrated automatic limiter
2 BPM synced LFO's 1 modulates filter cutoff, the other the delay time (only available for forwards delay)
4 LFO modes, sine, triangle, ramp, envelope follower
LFO, left/right channel inverse options
24dB/oct resonant filter placed in the feedback path
Switchable lowpass, bandpass, highpass, lowshelf and highshelf mode.
Saturation
Saturate and limit parameters
2 different types
Old-school spring reverb
Size, color and mix parameters
Optional mono mode
Fade out option, when using high feedback setings
Fade out time parameter
Pitchbend wheel, for smooth delay time changes


venerdì 23 marzo 2007

Voxengo Audio Delay, another great tool for free!!


Audio Delay is an auxiliary plug-in which allows you to delay stereo audio for a specified amount of milliseconds. Delay can be separately specified for each channel. Plug-in also features output level gain parameter for eachchannel.

In order to setup this product you will need to download its corresponding setup archive to the computer you are planning to use this product on. After download is complete you should unpack ZIP file you have downloaded into VstPlugins folder - the one which is connected with audio application you use and where this application expects VST plug-ins to reside (it is also suggested to create 'Voxengo' subfolder there, and unpack archive there instead of the main VstPlugins folder). After this has been done you will need to order your audio application to rescan plug-ins, or if that option is unavailable you will need to re-start this application.


Complete VST package from MDA


These free plug-ins are designed to work with Cubase VST and other VST compatible applications such as Logic Audio and Peak on the Mac, WaveLab and FruityLoops on the PC and many others.
To install, simply unzip the files into your \VSTPlugins folder, or follow the instructions of the host application. It is safe to overwrite older versions of mda plug-ins, but the sound or operation may be slightly different in some cases - keep a backup copy of old versions if you think this may cause a problem when going back to old material.
You may find it useful to move some into a different folder for off-line storage, or change some of the filenames as this affects the title and sort order in some hosts

This is plugin list:

Bandisto - Multi-band distortion
BeatBox - Drum replacer
Combo - Amp & speaker simulator
De-ess - High frequency dynamics processor
Degrade - Sample quality reduction
Delay - Simple stereo delay with feedback tone control
Detune - Simple up/down pitch shifting thickener
Dither - Range of dither types including noise shaping
DubDelay - Delay with feedback saturation and time/pitch modulation
Dynamics - Compressor / Limiter / Gate
Envelope - Envelope follower / VCA
Image - Stereo image adjustment and M-S matrix
Leslie - Rotary speaker simulator
Limiter - Opto-electronic style limiter
Loudness - Equal loudness contours for bass EQ and mix correction
Multiband - Multi-band compressor with M-S processing modes
Overdrive - Soft distortion
Re-Psycho! - Drum loop pitch changer
RezFilter - Resonant filter with LFO and envelope follower
Round Panner - 3D panner
Shepard - Continuously rising/falling tone generator
Splitter - Frequency / level crossover for setting up dynamic processing
Stereo Simulator - Haas delay and comb filtering
Sub-Bass Synthesizer - Several low frequency enhancement methods
Talkbox - High resolution vocoder
TestTone - Signal generator with pink and white noise, impulses and sweeps
Thru-Zero Flanger - Classic tape-flanging simulation
Tracker - Pitch tracking oscillator, or pitch tracking EQ
Vocoder - Switchable 8 or 16 band vocoder
VocInput - Pitch tracking oscillator for generating vocoder carrier input


Classic Chorus


Classic Chorus is a great sounding and easy to use classical Chorus VST plugin. Nice Plugin for adding Depth, Fatness and Stereo perspective to almost any Electrical Instruments or Vocal.
Features
Smooth Chorus effects
Stereo spread
Presets
Ultra low CPU usage
Supports sampling rates up to 96kHz
Full VST automation
Tips
1. Make an old mono Rhodes track come alive with the factory preset "Fat on Rhodes", or make your vocal tracks sound better by creating a stereo doubling effect using the preset "Vocal Overdub". Many more great presets are available for fattening up your instruments!
2. Use it for a good vibrato effect.


Mutagene 2WarpDelay


2WarpDelay pairs two warped-lattice IIR filters with a pair of delay lines and a bitmap which it scans to extract filter coefficients.

A stereo signal is fed through two delay lines followed by a warped IIR lattice filter. The lattice filter can be of any order from 1 to 80 and uses reflection coefficients extracted from an image. This output is fed through a saturation stage and a ducking / limiting stage before being fed back, again, into the delay lines. The lattice filter is warped, and by adjusting the warping parameter its frequency response can be easily adjusted.

Resonance controls the distance between spectral peaks and spectral valleys in the filter transfer function, and cutoff controls the cutoff of a first-order low pass filter that follows the lattice filter.